We believe we have an online store closer to you. Would you instead like to visit: Canada Australia Ireland Sweden UK USA

Single-Hand Brake LEFT

One-hand braking system for the Veloped/Walker, where both brakes (R+L) are operated with the left hand by a single brake lever.

SKU: 11-90-016
Stock Status: In Stock
Region: Available
(Item does not ship from the EU to Australia, Canada, or the USA.)
Delivery Status: 3-5 working days
665 kr
Including Tax: 133 kr (25%)
pcs

Get your personalised quote
Tell us what you need, and we’ll send you a personalized quote.
Request a Quote
Receive Your Quote
No obligation • We typically reply within 24 hours
Fast response
No credit card required
Free quote
The One Hand Brake for the left hand on the Trionic Veloped and Walker rollator, when installed, allows you to control the rollator's brakes with one hand. 
  • Brake lever with linear adapter that splits the single brake cable into two.
  • Both brakes (R+L) are operated with one single brake lever.
  • For left side assembly.

User Guides

The documentation for this product includes the manuals and instructions listed below. You can choose to view the documentation online or download it for local use.

Trionic Single-Hand Brake

One-hand brake that brakes the right and left brakes simultaneously.

Assembly: Trionic single-hand brake system (pictures show Right side) 
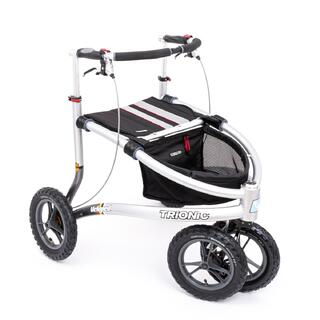
1 Assembly: Trionic single-hand brake system (pictures show Right side)

1. Mount the brake lever on the gripbar (as far to the front as possible).

2. Unscrew the screws (2x 4 pcs) that attach the R & L brake cover.

3. Attach the short brake cable to the brake on the same side as the brake lever.

4. Make sure that the cable-end nipple screw is facing outwards (wheel-direction).

5. Route the longer brake cable through the frame (betw. top & down frame tube).

6. Attach the longer brake cable to the brake positioned on the opposite side of the brake lever.

7. Cut a small hole (2x) through the fabric of the basket at each rear bottom corner (see RED circles in the picture).

8. Fasten the longer brake cable to the basket with the 2 cable-ties.

9. Re-attach the 2 brake covers again, using the 2 cable-ties with a Ø5 mm hole for the 2 upper screws (R + L side).

10. Stick one of the wheel QR-axles (Ø12 mm) through the cable-tie loop, and pull the cable-tie tight around the axle (provides the correct tension in order to avoid that the cable rubs against the tire, but without the brake cable being forced out of direction).

11. The R & L side brake cables can be individually adjusted, by using either the adjuster screws positioned at the brake, or the adjuster screws attached to the linear duplicator.

12. Make sure that the parking brake blocks the wheel completely.

Centering of the brake 2 Centering of the brake

1. Unscrew the brake collar screw 3-4 turns (reached through the brake cover hole).

2. Pull the brake lever and hold it tight.

3. While holding the brake lever tight, fasten the brake collar screw again.

4. Check that the wheel spins freely, without rubbing between brake/brake hub.

If you have any questions, please do not hesitate to contact our product manager Stefan Kindberg; +46-8-522 100 52.

Customer Reviews

Monika Römer
Left single-hand brake and handling
It skews to one side when braking, especially on sloping roads.

I have trouble getting over old town pavements with kerbs.

General FAQ

Relevant Guides

Search help

Also Purchased Products

Product Reviews    

  • The Veloped has become my faithful companion...…

    The Veloped has become my faithful companion. I can only recommend it. My range of motion has increased fourfold, giving me a better life quality. Thanks to the team for such a design. I would like to see it distributed more in Germany as well.

    My…

  • ER…

    Fast delivery. Excellent workmanship and very solid. It's fun to walk around with the Walker!…

  • Molly the trolley,…

    Perfect - this has given me my life back and most of my independence. Cleo the cocker loves it as well cos we can go off-road walking in some pretty rough terrain with the larger wheels and pneumatic tyres. No more rattling and bouncing. Kerb and …

  • Amazing!!…

    Here the Trek 14er comes in. Unlike regular rollators, it's designed to cope with rough/uneven terrain, it's sturdy enough to support me, yet still lightweight enough for me to lift in and out of my car etc. It has a seat for when I have to stop and …

  • Veloped Trek…

    I purchased a Veloped Trek with 14-inch wheels. The delivery was prompt and it was well-packed. The assembly was simple. I have used the Veloped on different surfaces: grass, rough tracks, and paths through a wood. I have a balance problem and it has…

  • Perfect for gravel roads…

    Purchased this for my 88 year old mother. It works perfectly in our rural area. She can now navigate gravel roads with the large tires (the small plastic wheels on her old walker kept getting stuck). It looks good too! She enjoys the positive comm…

  • Trionic Walker…

    We are delighted with the 12er S Walker. Well designed and beautifully made. The 4 wheels with linked steering give great stability yet have good maneuverability. We originally intended to buy the 14er with even bigger wheels as our drive has some de…

  • Wishing you a happy new year and partly thanking you for my Trionic 12er…

    The delivery was remarkably fast, the packaging was beautifully designed and the 12er is perfect for my needs. I actually managed to get down to the beach to test it on sand and am very happy with the result. In addition, it is so quiet on all surfac…

  • A great product!…

    My Veloped was delivered very quickly, exactly as fast as advertised. Everything else is as well just as described. My multiple sclerosis limits my ability to walk, but my Veloped allows me to walk almost anywhere again. High sidewalks in the city or…

Subscribe to our newsletter!

"> ?>