Ardith Sisbach
HAPPY WALKER
i ORDERED THIS WALKER AND IT HAS MADE MY LIFE SO MUCH BETTER. I AM ABLE TO WALK A LOT MORE THAN I WOULD AND CONTINUE TO DO MY CHORES AND YARD WORK.
I AM AT A DIFFERENT LOCATION A FEW MONTHS OF THE YEAR AND AM ORDERING ANOTHER ONE FOR THAT LOCATION.
Gunnar
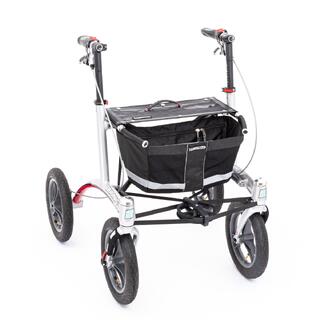
Trionic Veloped, adapted for playing golf
This is my Trionic Veloped, adapted for playing golf. It works surprisingly well and gives me a healthy and enjoyable alternative to driving a golf cart.
I have hanging golf bag holders on both sides, as well as self built holders for an umbrella, scorecard, coffee mug, and watch.
It makes getting around the golf course easy, practical, and—most importantly—keeps me walking.
Jim Sheehy
Given me my life back
I have the Veloped with two sets of wheels, 12” and 14”. I use the 12” for day to day & travel. It's a bit easier to get in and out of the car and tight spaces. The 14” are for serious walking including the four marathons, 8-10 half marathons and numerous 5&10Ks. All in all I have put something over 3000 miles on it in the 4-1/2 years I've had it.
This thing has given me my life back and allowed me to continue my travels. It has seen areas as diverse as the cobblestones of Paris and the islands of the Galapagos. BTW, I hate cobblestones but they are so much easier with the Veloped than any other Walker I've found yet.
I have made a few minor modifications, mostly by attaching bits with plastic tie wraps
It's not perfect but it's the best thing I've found and I've spent a lot of time looking and I still do.
Hubertus Sprenger
The best walker in the world
The best walker in the world, keep it up. Thank you so much.
Marten Bouwer
A super aid for forest walks
My wife loves walks in the woods, and this is truly a super walking aid.
Hampus Romu-Widell
Thoughtful walker for terrain and everyday use
Trionic makes thoughtfully designed walkers adapted for terrain and everyday use.
Built-in features that make it easier to get over curbs, for example, are missing from other walkers, but Trionic has solved this in a smart way.
MH
I have an incurable neurological…
I have an incurable neurological disorder that affects (mostly) my balance. I cannot walk at all without hanging on to something. Having led a very active life (I'm now 76) this was obviously a serious setback. After using my first (borrowed) walker it became obvious that wheel size and composition was a limiting factor. I came across the Trionic Veloped while searching on the web for "big wheel walkers." I read a number of the reviews, spent time on the phone asking questions of (a very helpful) Oshin, and finally decided to give it a try. It's costly in comparison to other walkers but has features not available elsewhere and provides me with a degree of mobility so I can get out of the house and negotiate surfaces that would otherwise be impossible. In short, I love it.
The primary drawback is that it's definitely for outdoor use. It's too large to be used in the house, in restaurants, etc. Though many would probably think it an advantage, for me it pushes too easily, to the point where I feather the brakes all the time except when going up hill. (Since I tend to fall backwards I probably don't stand as straight up as I should.) I'd love to be able to "dial in" some resistance. Also, for my use, it turns more easily than necessary in the "city" mode and with more difficulty than I like in the "off-road" mode. A complaint - the brake cones on my Veloped were neither precisely round nor flat across. This caused the brakes to pulse when applied until I wore the cones round, a process that took about three months. Further, there was loose crystalline debris in gap of one of the brake pads. This fell between the pad and the cone causing grooves in the cone and excess brake dust. No permanent harm from this but quality control should have caught it.
Complaints aside, I am about to order a Trionic 12er walker. It will be a good bridge between the conventional walker I use in the house and the Veloped. It's easily transported behind the driver's seat of my car and will allow me not only to quickly and safely navigate less-than-smooth sidewalks, streets, parking lots, lawns, etc. and still go into restaurants et al. For airline travel, it will provide one device to accommodate all my indoor and outside mobility needs without paying a fee to ship the Veloped. While Trionic products may on the surface seem costly, being able to continue to participate in and enjoy life is well worth the small investment.
Nicole marie middleton
Spoke to Johan at Trionic. Very helpful.
Spoke to Johan at Trionic. Very helpful.
Bought Veloped Sport and am delighted. Does what it says on the box. Literally. Could not use lightweight ordinary rollator, but this barrels over ruts, long grass, stony ground as smoothly as can be. I have three sorts of arthritis and would not be as mobile without it.
Very pleased altogether.
Christiane Wüste
The off-road rollator is brilliant
The off-road rollator is brilliant. In France I was out and about with it for about 10 km daily. I drove over bumpy gravel and stone paths, uphill and downhill, even on the sandy beach (that did take some strength though) and on the dried-out mudflats! Back home I now walk about 6-8 km daily on forest paths. My muscles have developed wonderfully and walking with the rollator is much more fun than, for example, the exercises in therapy. In France I was often asked about this device, because it was so astonishing to people where I could go from there.
Frank Wüster
Barbara Lawson
Tritonic 12 r rollator
Built well most helpful firm I’m delighted with the product, what more can I say except it’s brilliant,
Kate
Sturdy robust and greatly admired walker
I have now had my veloped trek for over 4 years. From the start johan johan and stefan have provided a first class service and regularly communicate with customers in a friendly but inobstrusive way throughout the year. I have three walkers Vera, Winnie and Thursday and all serve very different purposes. Vera was my first and by far the best. As an all terrain walker she is sturdy robust comfortable and light to push. Surrounds me for better balance. Is much admired as I go walking on bumpy woodland paths or across fields. Fits neatly in back of my Toyota Yaris with front wheels removed and back seat portion eased. I still get as much enjoyment and freedom from being able to access the countryside with Vera. Today have been on a beautiful walk at Kiplin North Yorkshire with Bluebells Blue skies and Birdsong. Sublime ! Thank you Trionic.
Cinda Weisgerber
I finally ordered my Veloped 14er when…
I finally ordered my Veloped 14er when I received my big Covid Stimulus check. It arrived and I was immediately more mobile than I had been for years because I had 5 crushed vertebrae. Two weeks later I suffered a brain aneurysm resulting in emergency brain surgery that left me becoming a 9% survivor. My Veloped sat in the garage for many months while I slowly recovered learning how to talk again, how to walk and how even to dress myself. But wow, "Persie" became so instrumental in my overall recovery and wellness. I learned to walk, first a few hundred feet, then a mile, and soon I was walking 2.5-3 miles in an hour. I became motivated to take on a big celebratory walk...that was the Camino de Santiago. So, being afraid of the Pyrenees, I started in Logroño and walked to Santiago in 29 days plus 6 rest days for a total of 424.3 miles including sightseeing.
I love my Veloped and intend to do another celebratory walk in 2027 as I survived long-term Covid that destroyed my aortic heart valve. This time "Persie" and I will start in Bayonne, walk to St. Jean Pied de Port to Santiago then continuing on foot to Fisterre and Muxia...650 miles. During my walk I will celebrate 60 year anniversary of my high school graduation and my 78th birthday. Thanks to Trionics I am mobile again. The only sad part is in the USA it is not considered a medical essential product. It could change the lives of many.
Caroline
I would like to congratulate Trionic
I would like to congratulate Trionic for producing such a fine piece of engineering; the Trionic Veloped. The ease of ordering, customer service, packaging, ease of assembly and of course the Trionic Veloped itself have all exceeded my expectations. For the first time in a long while, I have been able to cross a field and bring treats to my 3 lovely donkeys. I have had MS since 1980 and from experience, I know more about inhibited mobility than the professionals who design and manufacture traditional mobility aids. In my rural life, I do not live on a smooth street and I am confident that the Trionic Veloped is the missing link which allows the "less-able" to fully participate in their chosen lifestyle!
Henry Suttkus
A very stable rollator, especially for people with ataxia
The disadvantage is that there is no service in Germany and the medical supply stores do not offer service for other manufacturers' devices. The service from Sweden is good in terms of communication, speed, and work instructions.
Hans Peter Weber
UPS
I'm very satisfied with their customer service, but forget about UPS. They announced a delivery twice and didn't show up. I received the package on April 27th, 2026, without any prior notification. I no longer want deliveries from UPS, only DHL.
Andrea Günther
Simply AMAZING
I ordered it last weekend, and the Veloped arrived on Wednesday. It's very easy to assemble. And most importantly, it's a joy to ride over rough terrain. My husband and I immediately chose a challenging route: cobblestones, grass, fields, roots. No problem at all! Yesterday, I took the bus to a friend's house. How easy it is to get off facing forward! Getting off backward with my old walker was always so difficult. This weekend, I'm going to the Baltic Sea with a friend, and we'll try riding it on the beach. I'm so happy!
John Miller
Works. Great
I use it for my pickup gripper stick the rubber gripping slot conforms to it square shape perfecty
Fan. G
Bit the bullet and bought the stool
Bit the bullet and bought the stool
Bit the bullet and bought the stool as the seat on the Veloped doesn't suit me and I could use it else where too.
It is expensive, but must say I'm impressed. Feels a bit like riding a horse, so encourages better posture and less back ache. Have used it in the kitchen for cooking, in the garden, out in walks and am sure once the weather improves will use it much more.
Attached to the side with the straps tha were on the Veloped when I bought it second hand.
Kerstin
I wouldn't have had a chance to live normally without a Trionic!
I have had a Trionic rollator for several years. Or rather two, one in Stockholm and one in the countryside in Sörmland. The snow removal in Stockholm has had and continues to have great difficulties this season with jagged ice chutes for sidewalks and large snow banks to force. I wouldn't have had a chance to live normally without a Trionic. For example, I never have to worry about slipping over. It has a perfect construction.
- Brakes that work.
- Generous dimensions on the wheels that can handle most things.
- A correct center of gravity - incredibly important - which eliminates the risk of it tipping forward.
- A width and weight that means it doesn't tip sideways if it slips.
Unfortunately, I think many people turn away because of the price. When I got my first rollator, I translated the price into the number of milk cartons and then how long I would have to live - the consumption of one carton of milk/day - for the rollator to be paid for. I won.
Patricia
A marvellous benefit!
My Trionic walker has been a marvellous benefit to me and given me the confidence to go out and about more. I shall be 88 next month.


 1 Assembly: Trionic single-hand brake system (pictures show Right side)
 2 Centering of the brake